In this tutorial, we will show you how to develop the first JSP page that outputs an important message: Hello World to the web browser.
If you do not have Java IDE available, we are highly recommended to install NetBeans IDE for practicing and learning JSP.
First, launch the NetBeans IDE.
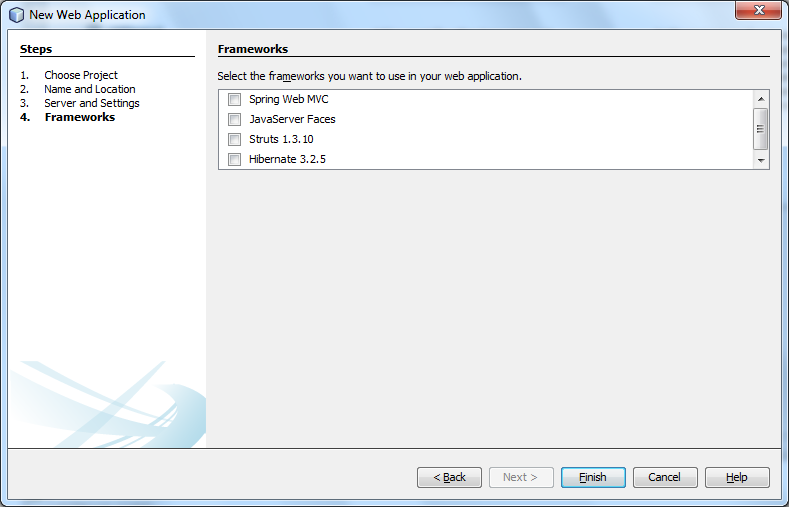
Then, create new Web Application project by following the steps below:
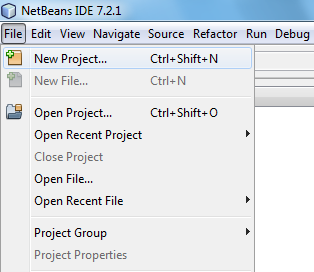
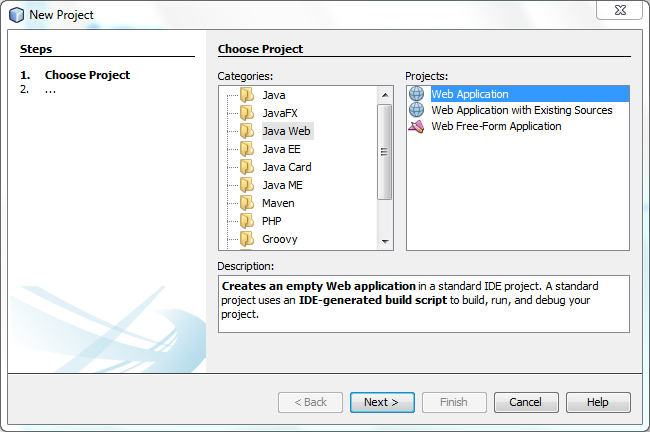
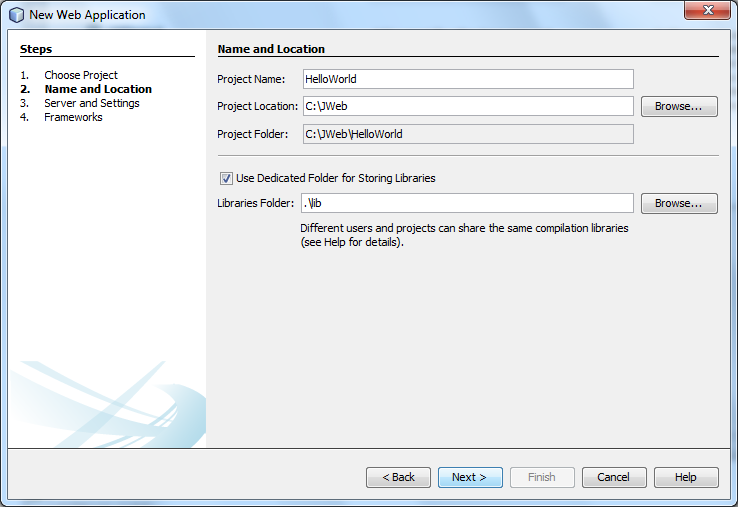
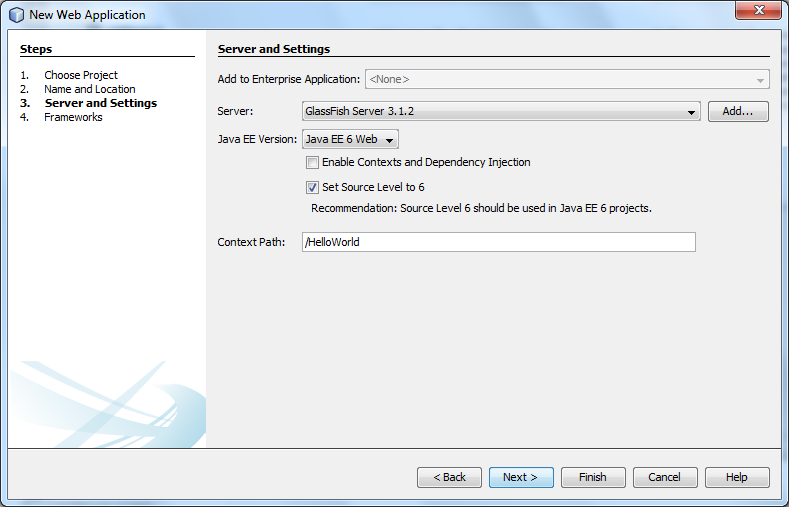
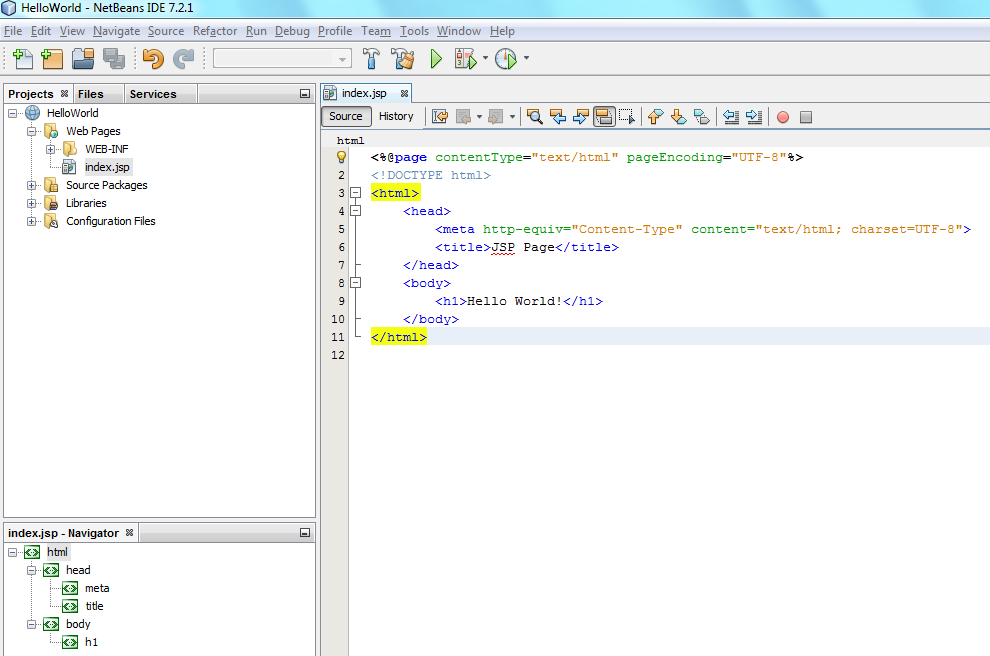
Next, replace the code in the index.jsp file by the following code snippet:
<%@page contentType="text/html" pageEncoding="UTF-8"%>
<!DOCTYPE html>
<html>
    <head>
        <meta http-equiv="Content-Type" content="text/html; charset=UTF-8">
        <title>JSP Page</title>
    </head>
    <body>
        <h1><% out.println("Hello World!");%></h1>
    </body>
</html>
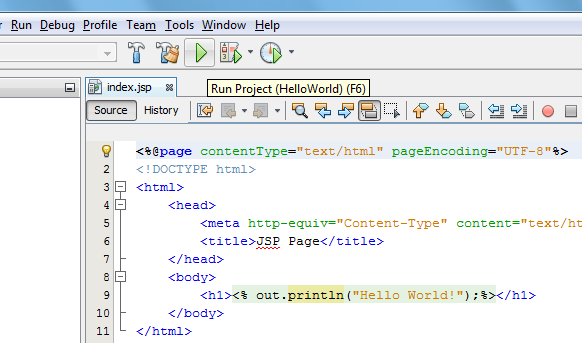
The following screenshot is the output when you run the JSP page in the web browser. It displays the message “Hello World” as a standard heading H1 of the HTML page.
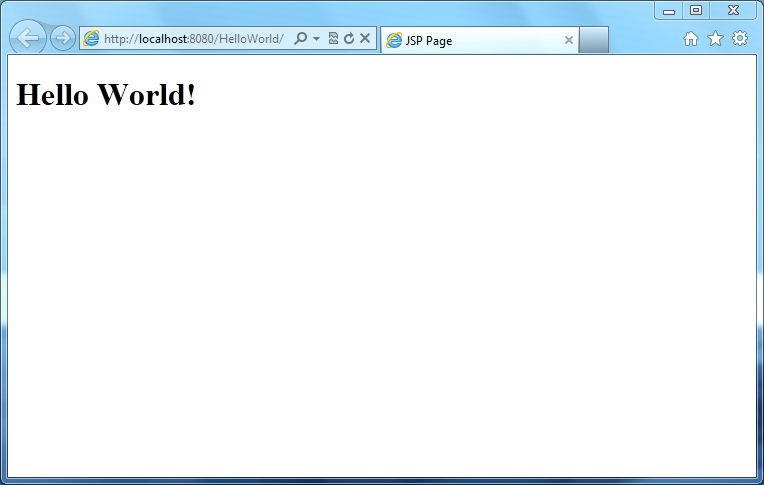
The index.jsp page is composed of HTML and Java code. The Java code is embedded inside the HTML document between notations <% and %>.
<% out.println("Hello World!");%>Code language: HTML, XML (xml)In JSP, The code snippet above is known as Scriptlet. Inside the scriptlet block, we used the method println() of the out object to print the messasge "Hello World".
Congratulation! you’ve developed the first JSP page and launch it in the web browser to get the output.